The Mews
Now that having a hawk of my own was on the agenda I needed a
'Mews'The word "mews" comes from
the French muer = "to change". Falconry birds were put into the mews while
they were in moult.
to bring my new comrade home too. A Mews is
the traditional name for the place where falcons are kept, especially when they
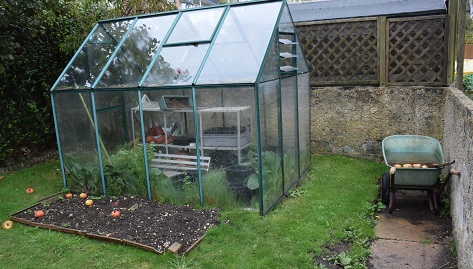
are in moult and are then regrowing their feathers. That old greenhouse, right
at the bottom of the garden, was going to have to go. Frankly it was no great
loss. Although I put it together for my wife, from a kit, some twenty years
ago, all I had done with it over the last decade or so was repairs after the
winter's storms blew out yet another pane of glass. I have a nice man who looks
after the garden for me and he inspected it, considered it, quoted me a price
that included disposing of all the wreckage which worked for me. Suddenly it
had vanished.
I admit I thought about it but I decided I wasn't going to try and build my own
custom Mews or have one purpose built to my plans. I would simply get a
commercially available unit and adjust it to my requirements. I looked at a lot
of sheds that would have done the job with only minor modifications but finally
settled on a purpose built mews from
UK
Aviaries because it provided the proper vertically bared window, which a
hawk can see, and the air-lock style entrance chamber so that, if you are
'free-lofting', opening the door so you can go in or out does not immediately
set the bird off for a little impromptu, pre-prandial excursion.
One of the important strategic decisions I made right at the start was that I
needed electrical power in the Mews. I am going to have to have to live with
this plan for many years remember and retrofitting that later would be a total
pain. Not official wiring, of course, but what is just what is effectively an
extension cable that plugs into a socket through an ECLB in the house. This
means I can have sensible lights, a monitoring camera, charge the inevitable
laptop (they do seem to follow me about) and possibly even move the small
freezer that contains the hawk food down there one day. The gardener laid a
cable into a trench along the wall for me so it is all nicely buried out of
sight and I carefully bought the proper to
do the job with so nobody is going to accidentally put a spade through it one
day and test my earth-leakage trip.
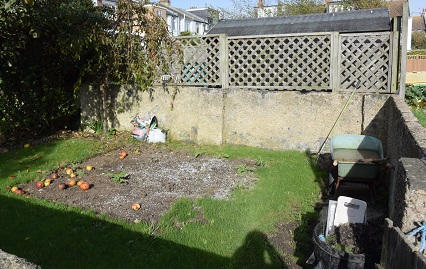
The next problem was that, although removing the greenhouse had released a
space to use, it was by no means yet a suitable site. Any 'shed' needs a proper
base if it isn't going to wobble about and quickly rot out from the ground up.
I looked for a suitable company to come and convert that area into a solid
foundation and sort out the problems caused by some strange old concreate
sections that are at a lower level than the rest of the garden.
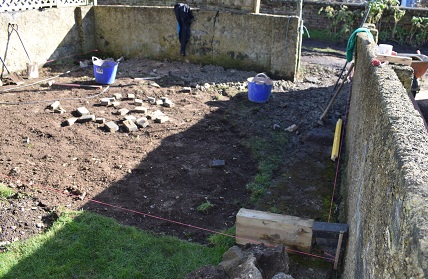
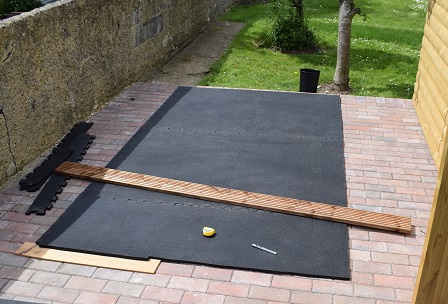
I had Coastal Paving come and
they look at it all and quoted me a specification that I felt was good and
solid but that would require a lot of preparation work and materials. I decided
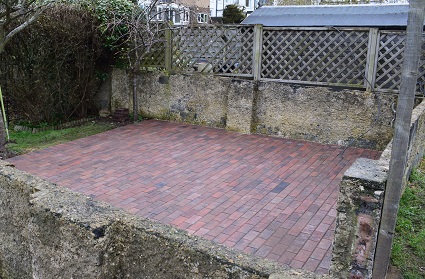
to go with that and I'm rather pleased with the results. What I have had done
is that the whole site was dug out and then back-filled with crushed concrete,
then a layer of sand and then the paving bricks. All this laid down layer by
layer under the attention of a power compactor. The result is hard, solid and
should outlast me and then some so my aviary will not collapse about my ears.
My armoured cable just runs underneath everything and then pops up into the
'office' end of the building, safe from harm and complications.
Incidentally our local council helpfully publish a set of documents on their
web site explaining what does and does not involve planning consent. This meant
I was able to plan this to be within the definition of a simple shed by quite a
margin.
The other thing that having the paving done allowed me to do was to level the
whole bottom end of the garden. It has been a pain for years as it sloped down
into a damp patch that was somewhat lower than the back lane and hence flooded
at every opportunity. This means I can now roll a barrow containing diving or
gliding equipment down the garden and out of the back gate without facing the
sudden six inch step up or having to put on my wellies and paddle through the
mud, water or worse to get to the car and back.
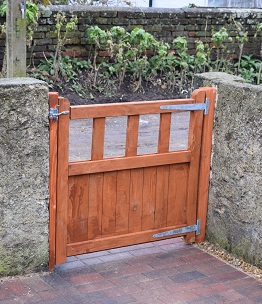
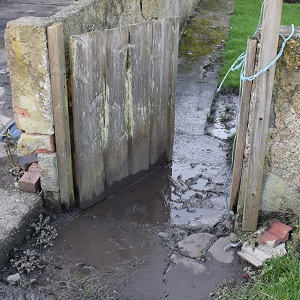
The other thing that really needed doing was to replace the
.
It had got to be rather sad, sitting in its muddy puddle, but I had made it
myself over thirty five years ago and it had done its time. I didn't build
another, the new gate is by B&Q, the wood stain/preservative is Ronseal, the
screws are 10mm stainless and the uprights are cut by Nigel's bandsaw to get a
proper fit on the horribly uneven walls. I'm actually quite pleased with the
results.
The Mews was the largest size that I could fit into the space available without
taking out existing trees while still allowing for all round access to slap on
a regular coat of rot-proof as required. It is a nominal 14 x 6ft
(4.27 x 1.82m) divided inside into a 10 x 6ft
(3.0 x 1.82m) bird room and a 4 x 6ft
(1.22 x 1.82m) 'office'. Although I am only planning for one bird at
the moment I have room to expand if circumstances change. I was rather happy to
discover that having the mews erected for me when it was delivered could be
included in the price even if I did need pay an additional mileage charge for
being outside of their usual home turf. I felt this would simplify things a bit
and watching them do it all convinced me that it had simplified things a
lot.
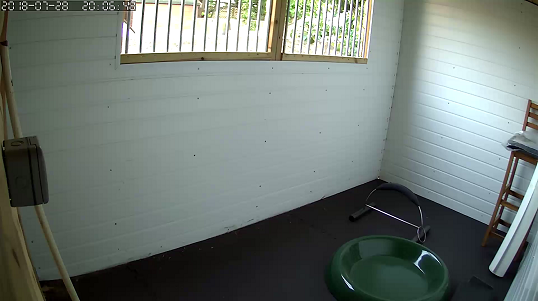
The Mews is, basically just a posh shed with a vertically barred window and a
dividing wall making it into two rooms. The vertical bars are important for a
hawk to see and avoid (hawks get killed flying into glass both in captivity and
in the wild) and vertical bars are impossible to try to perch on. There is the
slight snag that a hawk sized bar spacing does not deter all the local wildlife
and many falconers have arrived at the mews bearing breakfast to discover a
pile of feathers and a well fed hawk that has dined early on some fool sparrow,
starling or such that didn't realise what was going on here. The windows at the
office end are glazed so the scales and other tools get some protection
although the valuables and the more specialised equipment lives in the workshop
back at the house.
I was initially surprised that no window shutters or such were suggested but,
apparently, if you are a hawk, you view being consistently out of the wind and
rain as luxury living. I did wonder about adding a transparent but rain
reducing pull down blind to the window to add some comfort for me but then it
would be me that has to turn out in the rain to adjust it if the weather turns
nasty so maybe not... or maybe I could automate it?
I had deliberately ordered the Mews as unlined, although both plastic and ply
panelling options were offered, as I had some ideas I wanted to apply. Firstly
I wanted the wiring to be under any internal cladding and I wanted to ensure
that after my modifications there were no obvious places where water could
collect and promote rot.
The bird side of an Avery is normally open to the ground beneath but as mine is
standing on brick I tried to make maintenance simpler by flooring it with
Equestrian Matting. That's the stuff you put in the stable to soften up the
concreate floors for your pony. I hadn't quite realised what it was going to be
like until it was delivered. The truck driver hauled one 50Kgm roll of
interlocking 2cm thick rubber sheet up to my door and said "I've got two more
like this to come." It was very heavy but I spent a happy afternoon trimming it
to size and fitting it. Then I put a sheet of 'pond liner' over it to be
something I could drag outside and hose off quickly when required. I panelled
the inside walls with PVC Soffit cladding held on by stainless steel screws.
Using the matching trim strips gives this a nice wipe down/hose clean finish.
The whole ensemble is fully disinfectable if I have a problem.
I fitted 'office' end with a heavy duty 'kitchen worktop' counter in Beach at
standing height and added a pair of cheap EBay 'bar stool' height chairs to
match. The flooring is a piece of kitchen vinyl from the my local carpet store.
I actually went in there looking for an off-cut but just buying 1.2 meters from
the roll it was cheaper, padded and in my choice of colour. The walls of the
office are not lined.
I hooked up the electrics with 'outdoor' grade (minimum
IP66IP66: Protected from total
dust ingress. Protected from high pressure water jets from any direction,
limited ingress protection
) parts and glands as it might be a bit
exposed to the elements through the open window but I laid it out to be a
pretty normal style with power available for tools and instruments over the
countertop and with a double switch over the internal door to control the bird
house and the office lights separately. I used two 20W led flood lamps in both
and the light level is superb. Yes, me being me, I put in a CCTV
so I can VPN into my hawk from anywhere in the world and see that she's getting
on OK. Also the light over the door is hooked up to my WiFi home automation
system. This, and the patio light at the other end, when both on together
provide for good illumination of the walk to and from the house in the dark but
they both need to be remotely controlled for this to work.
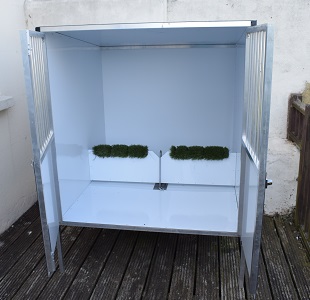
Finally the hawk oriented furnishings were added. I bought two ready made
stainless steel
perches with heavy feet so they don't need to be stuck into the ground to stay
upright. This means I can have one in the bird house and another for my
workshop back at the house that can also go out onto the patio/balcony if we
are taking in some sun together. I also bought two large
that sit within leash distance of the perch. Actually I think they were a bit
over done and if I ever need another I'll just go up the Garden Centre first
and look at planting trays. I use a pair of normal ceramic 'dog bowls' for any
food that isn't a treat or a training reward.
So what else is there? Well not to much really as it might be exposed to petty
theft. There is the journal that logs weight and food and the
needed to track the weight of the bird carefully. Most of the day to day
equipment lives in the that I
bring the food down in. I do have a much larger toolbox for the 'going out in
the car' days with radio and GPS trackers plus an endless collection of spares
but this is just the day to day stuff.
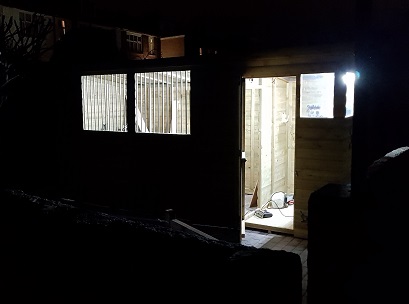
So that's it. That was the transformation from being the sad and gloomy place
at the bottom of the garden into a pretty reasonable home for a hawk and a
convenient place to park .
I probably could have been more economical and some details might have been
better left until I had some more experience but I needed something that would
be fully functional from day one. I haven't discovered any horrible blunders
yet and having seen some mewses stood on what was once grass I quite like my
flooring system although some people think it over complex. I have obtained a
PVC sheet as a window cover that I may fit later for the winter if it becomes
evident it would be an improvement. I have obtained some drop-lock style
fastenings for this.
The final piece of building work was the
weatheringa weathering yard is
used to allow captive raptors adequate time outside.
. It would be
nice to just leave the bird outside but I need a cat proof and fox proof
enclosure. This came flat-packed like an Ikea kit from Box Clever. It went
together quite easily, provided you remember it is 4 foot panels so you need
plenty of space. It sits on the balcony outside my living room and has lockable
doors and a hose down to clean finish.
Back to main falconry page.

by Nigel Hewitt