Setup
Warning
This is a fast moving field. This information will be out of date in some detail even before you read it.
 A caveat. This lot rather depends on you having control of your own Wi-Fi. I
am going to refer to 'your' router quite a lot as we set things up and expect
you to find out how to do something on the make/model you have. If it's part of
a shared system this is all going to end in tears. Go and read somebody else's
web pages. I'm just not going to be much use to you.
A caveat. This lot rather depends on you having control of your own Wi-Fi. I
am going to refer to 'your' router quite a lot as we set things up and expect
you to find out how to do something on the make/model you have. If it's part of
a shared system this is all going to end in tears. Go and read somebody else's
web pages. I'm just not going to be much use to you.
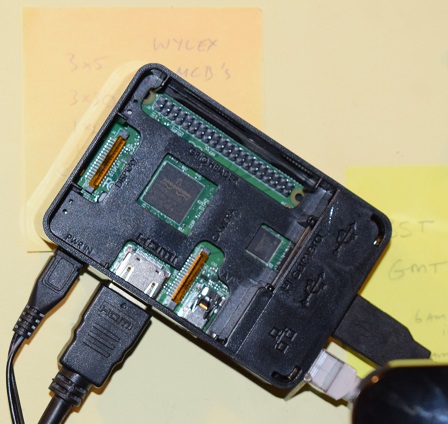
So I bought this Pi-3... It could have been cheaper but I bought a full, ready
to run kit with extra goodies for £65 from Amazon.
To check it out I plugged it into a nice high-res monitor, added a mouse and a
keyboard from the used pile here and ran it up on the supplied Raspberrian
operating system so I knew that it all worked.
I checked I had a C++ (.cpp) compiler as some things are not negotiable. Don't
worry. You don't need one. It's just a retired programmer thing...
I tried downloading the 'Home Assistant' bootable image to another memory card
but had no success with it. It might just have been that I didn't understand
what to look for yet but I didn't seem to be getting anywhere. So I went for
the manual configuration route because that would give me nice steps.
For the official version see: https://home-assistant.io/docs/installation/raspberry-pi/
They say that you should login remotely via ssh (secure shell) so I used
putty which is pretty much a tty standard for the PC and is a quick
internet download. I don't see why SSH is a big deal as I had a keyboard and
screen, which I'll talk about later, so I haven't used SSH to access it much
since, except for tricks, again see later, and it all still works.
However if you don't want to leave a monitor/keyboard/mouse attached to the Pi
or you want to use some of my remote control tricks later this the sequence I
use.
Plug the Pi into the router on an Ethernet cable. Yes, you still need a
monitor, keyboard and probably a mouse for this bit.
Go onto your router's configuration pages and find the Pi's ip address. Mine
called itself raspberrypi and its assigned IP was 192.168.1.113
for now.
Fire up the Pi and if it's new login as user pi and password raspberry. Do
promise me you'll change this before letting it loose on the web.
Launch Raspberry Pi Configuration from the Preferences menu
Navigate to the Interfaces tab
Select Enabled on SSH
Click OK
Then go to putty on the PC using the ip you found as the Host Name and
check the SSH button. The default username and password are still pi and
raspberry. You should get in and have a prompt that looks something
like:
pi@raspberrypi:~ $
This is <who you are>:<where you are> $
Setting up is quite quick. These are the commands you always run on a new Pi to
bring it up to current status and that you need to use occasionally to catch
up:
  sudo apt-get update
  sudo apt-get upgrade -y
I wanted to get the mosquitto MQTT message broker software that underpins all
the communication with the smart switches and things I wanted to use. You don't
actually need mosquitto but, if that's the case, you probably want to read
somebody else's guide as I'm a bit MQTT centric.
  sudo apt-get install mosquitto
  sudo apt-get install mosquitto-clients
Then fix up the default configuration. We use nano not because it's a nice
editor but it works, we can sudo it and the instructions are on the screen
so you don't have to look them up. If I told you to use vi I'd be
putting raw editor power in your hands but you'd hate me for it.
  sudo nano /etc/mosquitto/mosquitto.conf

  # comment out the include_dir line and add

  allow_anonymous false
  password_file /etc/mosquitto/pwfile
  listener 1883
Then do a password file giving your choice of username.
sudo mosquitto_passwd -c /etc/mosquitto/pwfile <redacted username>
it asks for passwords so
  <redacted password>
  <redacted password>
Now restart things so mosquitto gets started. We can use the brutal method as we don't have anything
breakable running yet.
sudo reboot
Right. Now we want to get the homeassistant download.
  sudo apt-get install python3 python3-venv python3-pip  (get python - mine already had it)
  sudo useradd -rm homeassistant                         (add a new user called homeassistant)
  cd /srv                                                (this is a service so its stuff goes here)
  sudo mkdir homeassistant                               (make a place to put things)
  sudo chown homeassistant:homeassistant homeassistant   (give ownership to your new user)
  sudo su -s /bin/bash homeassistant                     (now become that new user)
  cd /srv/homeassistant                                  (go to the place we just created)
  python3 -m venv .                                      (generate a python virtual environment here)
  source bin/activate                                    (and enter it)
When you activate and enter the python virtual environment the prompt becomes:
(homeassistant) homeassistant@raspberrypi:/srv/homeassisnant $
to tell you you are in the homeassistant virtual environment.
Yes, we have too many things all called homeassistant. I know. Beware of this
if you're reading somebody else's examples where they can, perfectly validly,
use other names.
Now run
  pip3 install homeassistant                             (load hass - you only need to do this the first time)
  hass                                                   (and then start it up)
That just gives you the bare-bones homeassistant. It should read its
configuration file and try to load the required components and call home to get
the ones it doesn't have installed. This being the first time you started it
that is most of them. Subsequently it will only go and download something when
you edit the configuration to call for a new feature.
They say that it takes 5-10 mins to download its additional stuff the first
time. For me it started at 16:26 and by about 16:50 I realise it was never
going to return as it was now up and running so I turned to the PC, browsered
to http://192.168.1.113:8123 and there it was. Not doing much yet but I
had access to the web interface.
It whinged about changing the passwords so I reset pi's it to
<redacted>. Then I changed the su password to
<redacted> as I now had an SSH port open.
Finally I changed to homeassistant user's password to
<redacted>.
Then I wrote them all down on a post-it and stuck it on the wall next to the
pi.
configuration.yaml, a file that you become intimately acquainted with
later, is helpfully in a hidden folder with restricted in access, typical
unix guruspeak choices. Go to...
/home/homeassistant/.homeassistant
so first I used my su powers to allow anybody access
chmod 0777 configuration.yaml
To start the system the procedure, as user pi, was to open a shell window or
use SSH and type these lines:
  sudo su -s /bin/bash homeassistant
  cd /srv/homeassistant
  python3 -m venv .
  source bin/activate
  hass                               (this never returns unless you stop it)
We'll fix this to be automatic in a bit.
Now we'll add a mqtt section to the configuration.yaml
mqtt:
  broker:    127.0.0.1
  port:      1883
  client_id: !secret mqtt_id
  keepalive: 60
  username:  !secret mqtt_username
  password:  !secret mqtt_password
  protocol:  3.1
and then add a secrets.yaml file containing
mqtt_id:         <redacted>
mqtt_username:   <redacted>
mqtt_password:   <redacted>
You don't have to use secrets.yaml but it's good practice and means I
can just email you a copy of my configuration.yaml file if you're helping me
with a problem.
Restart things and homeassistant will download its mqtt stuff and that's on the
road.
OK. Time for a recap:
I stuck with the standard raspberry system and manually installed hass.io
I have installed mosquitto.
I have a new user called homeassistant.
I created a python virtual environment.
I installed the homeassistant stuff into it.
I can configure stuff and it runs.
Only one thing is left under set-up and that is to go to your router and award
the Pi a fixed address based on its mac address. Hence it will always be at
192.168.1.201 on my local intranet and I can put a shortcut to
http://192.168.1.201:8123 on my browser's bookmark toolbar so it is just
one click away. This will later allow us to remote in.
Put the kettle on. You've earned it.

 by Nigel Hewitt